The Requirements:-
1-NetBeans IDE 9.6.1 with Struts2 plugin. You can get the plug-in from here: http://plugins.netbeans.org/PluginPortal/faces/PluginDetailPage.jsp?pluginid=23467
2- JDK 1.5 or higher
3- Tomcat 6
---------------------------------------------------------------------------------------------------------------------------------------
Now let us discuss about Namespace in struts 2. In Struts 2 Namespace is roughly equivalent to modules in Struts 1.x but its more easy and convenient to work with Namespace. I will take the xml way of configuration.
Now Followings are the screen shots of how to create a Struts 2 web project using NetBeans.
1-

2-

3-

4.a-
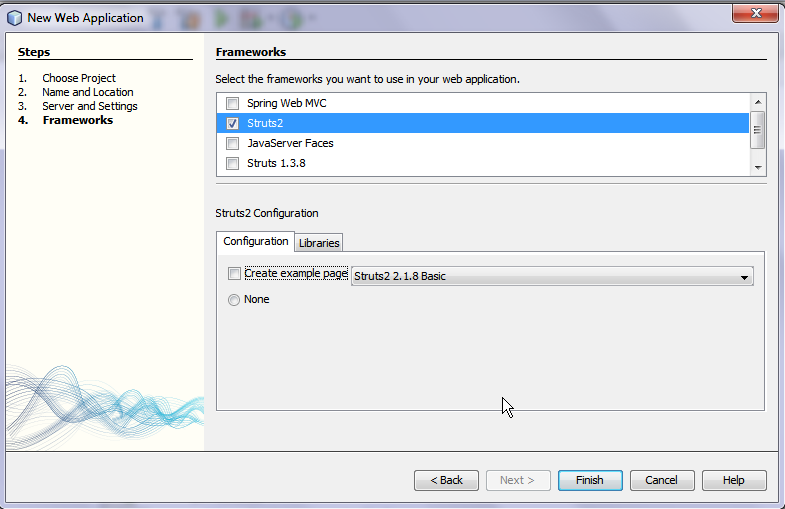
4.b-
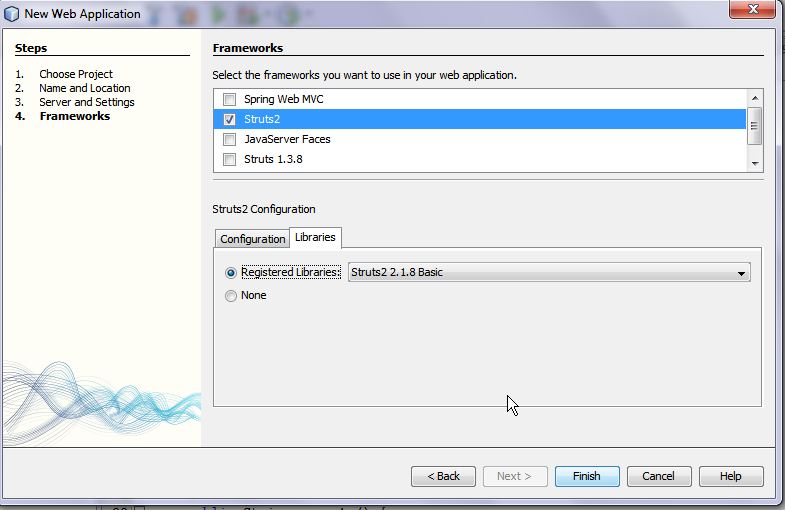
After these steps please check whether the required libraries are installed in the project library folder as per the following screen shot.

Now before proceeding any further, let us see the whole project structure:
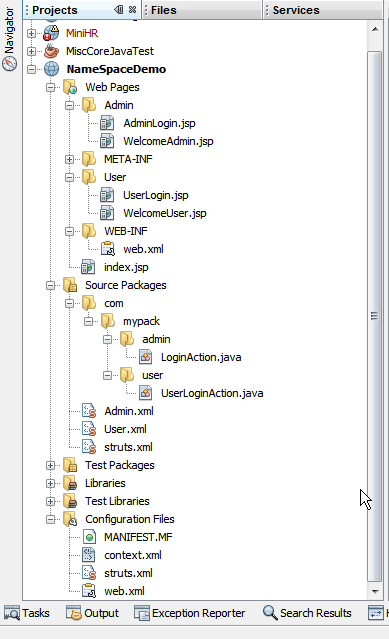
1- An Index.jsp page
2- A Struts.xml page (which is the main config file for Struts 2 application)
3- A web.xml file
Now lets have a brief discuss about structure of this project. This project has 2 modules:
- User Module
- Admin Module
At this stage the readers are requested to create the project structure as shown in the above pic. In that way it will be easier to follow the discussion.
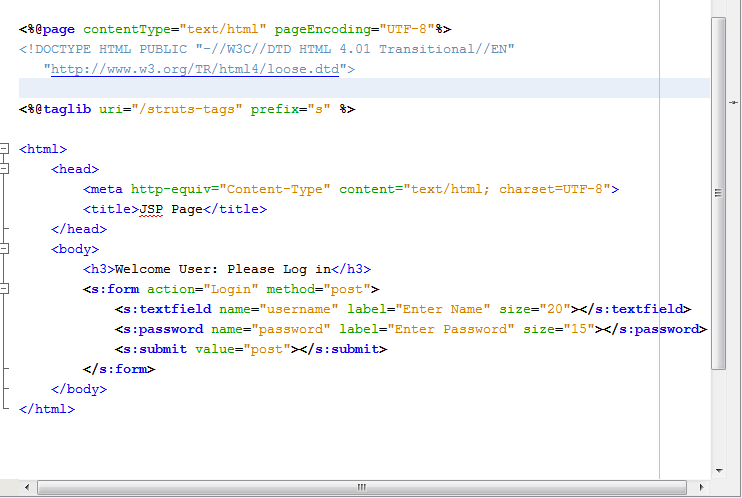
Now lets start our discussion from the index.jsp page : This Page contains just 2 links. One to User login page and the other to Admin login page.
1 - Copy the contents of this into your index.jsp page -

Especially pay attention to the <%taglib uri="/struts-tags" prefix="s" %> tag. This tag enables the struts2 related tags in the page.
2 - Now lets have a look at the struts.xml file created by the struts plug-in for us. At this stage it looks like a bare bone struts config file having only declaration for package and extends elements and looks like this -

2.a- Make changes to struts.xml file as shown in this pic


2.c- Now copy the following to the User.xml file :


Lets see how the flow is maintained :
a- When the user clicks the user link in index.jsp page, s/he will be forwarded to something like this : "http://localhost:8080/NameSpaceDemo/User/LoginPage.action"
The framework will automatically add .action to the end of LoginPage action. Please also mark the /User at the end of project name in the above url. In this way we can be sure that we are in fact now in User module.
b- At this stage the framework will search for a User.xml file to resolve the /User namespace and after resolving the Namespace it will try to search an action named LoginPage inside that User.xml file.
c- In our case what we are doing is we are just using that action to forward to a jsp page named UserLogin.jsp page which must reside in a User folder inside web pages folder as shown in the project structure screen shot.
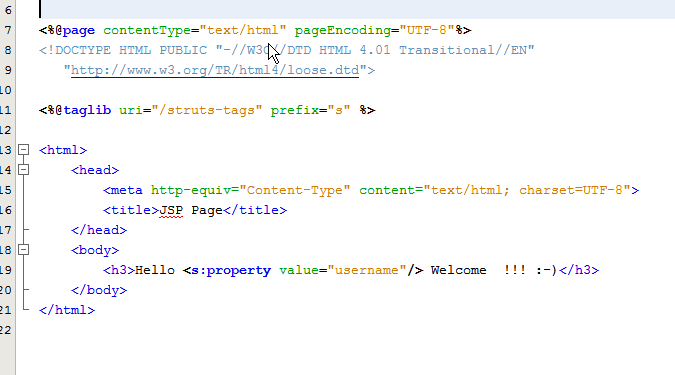
d- create the UserLogin.jsp page and WelcomeUser.jsp and copy the below respectively :
UserLogin.jsp:-
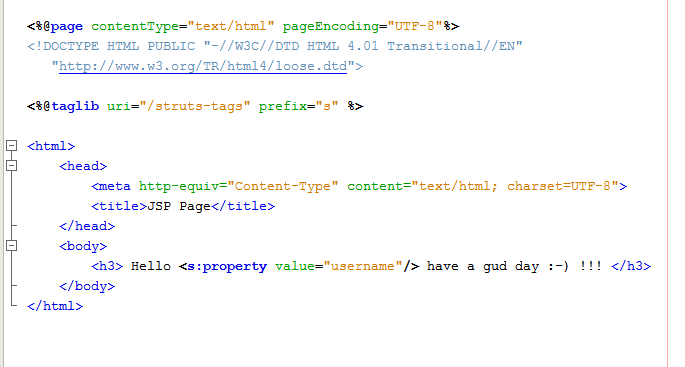
WelcomeUser.jsp
e - Now simillar way create an Admin folder(if not already created) inside Web pages folder and create these 2 files in it:
1. AdminLogin.jsp

2.WelcomeAdmin.jsp
At this stage if we run the project, the index.jsp page shows up and if we click the user login link, then it takes us to a page where it asks us for user name and password. Now at this stage we dont have any code to handle that username or password input. so if we give any username or password it will throw a nasty Login action not available message.
The Most important thing to note is that, when we click the submit button, again the framework will add the .action to the end of Login and it will search for a Login action in /User namespace. Right now though the Login action is defined in User.xml but we have not yet developed the required codes .
So let us get working on the codes now:
1:- first create the package as shown in the project structure and create a class as mentioned in the following screen shot and give the name as - UserLoginAction

2: Now copy the following codes into the class created above:
package com.mypack.user;
import com.opensymphony.xwork2.ActionSupport;
/**
*
* @author xxx
*/
public class UserLoginAction extends ActionSupport {
private String username;
private String password;
public String getPassword() {
return password;
}
public void setPassword(String password) {
this.password = password;
}
public String getUsername() {
return username;
}
public void setUsername(String username) {
this.username = username;
}
public UserLoginAction() {
}
@Override
public String execute() {
if (this.username.equalsIgnoreCase("ben") && this.password.equalsIgnoreCase("123456")) {
return "success";
} else {
return "error";
}
}
}
3- Simillarly create a package com.mypack.admin and create a class LoginAction.java and copy the following contents into it:
/*
* To change this template, choose Tools | Templates
* and open the template in the editor.
*/
package com.mypack.admin;
import com.opensymphony.xwork2.ActionSupport;
/**
* @author xxx
*/
public class LoginAction extends ActionSupport {
private String username;
private String password;
public LoginAction() {
}
public String getPassword() {
return password;
}
public void setPassword(String password) {
this.password = password;
}
public String getUsername() {
return username;
}
public void setUsername(String username) {
this.username = username;
}
@Override
public String execute() {
if (this.username.equalsIgnoreCase("admin") && this.password.equalsIgnoreCase("admin123")) {
return "success";
} else {
return "error";
}
}
}
The reason we are extending ActionSupport is, it implements a number of important interfaces and provides support for Validation and Text Localization.
Note:- we have hard coded username and password into the program.
For UserLogin => username = ben and password = 123456
For Admin Login => username = admin and password = admin123
Now our Demo program is almost complete. But its a very raw version. Though we have used ActionSupport class but we havent used its Validation method and other features . In the next one we will see how these are done
To do List:
1:- Use validation
2:- Use message properties
3:- Error Handling